[VAST][1.13.1.306] How to enable the SD9365/SD9366 wiper in the VAST LiveClient using the DO?
Question
How to enable the SD9365/SD9366 wiper in the VAST LiveClient using the DO?
Answer
The wiper control function is not integrated in the VAST LiveClient, this function was only implemented in the VAST2. If you require to control the wiper using the LiveClient, it is necessary to link the wiper to the DO trigger (can be controlled in the LiveClient). Note: before starting the configuration, be sure to enable the "Keep detecting DI/DO status" in the VAST Configuration > Client Settings > General Settings otherwise you wont be able to enable the DI/DO in the VAST device tree.

Please follow the next steps to configure the wiper using DO:
Step 1. Be sure that the DO is not being used in the SD9365/SD9366.
Step 2. Access the VAST LiveClient.
Step 3. Go to Configuration > Alarm Management… to set an alarm.

Step 4. In the Alarm Management window click “New”.

Step 5. Name your alarm (in this example we used “Move wiper”, but you can name the alarm as you like) and click Next.

Note: adding a description is optional.
Step 6. In the “Trigger” section, click on the “Add” button,

Then, choose the event as “Trigger type” (this will let the software know that is a trigger action), the category as “Camera events” (this will check the camera status) and be sure to select the “DO-1” as the type and click “OK”.

Note: you can also select another DO if available.
Step 7. In the Device List -DO-1 window, select the SD9365/SD9366 camera.

Be sure the Notification type is set to “Trigger” (this will check if the DO changed from Normal to Trigger). Then, click “OK”.
Step 8. Double check that the trigger has been saved, then click Next.

Step 9. In the “Action” section, click on the “Add” button to add the action to be performed (Wiper movement).

Step 10. In the “Action” window, select the HTTP action, then use the following URL to enable the wiper in the camera:
http://<camera IP>/cgi-bin/admin/peripheral.cgi?channel=0&operation=set& washer_mode=wiper&washer_status=on

So, each time the DO is enabled, it will send this command to the camera and the wiper will move. Note: be sure to authenticate the command, otherwise the camera will block the request.

Step 11. Be sure that the action was correctly saved and then press “Next”.

Step 12. Keep the schedule as “Always” (making the alarm available 24 houts /7), then press Next.

Note: you can modify the schedule if needed by selecting it and clicking on the “Edit” button.

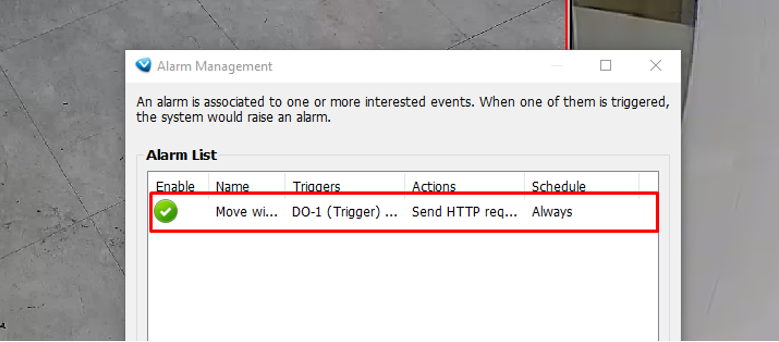
Step 13. In the “Detail” section, be sure that everything has been correctly saved and then click on the “Finish” button to save the alarm.
Step 14. You will see the new alarm listed in the “Alarm List”.
Step 15. To control the wiper, go to the “Device Tree” in the LiveView and click on the “+” icon, you will see the list of available triggers in the device.

Step 16. Double click the “DO-1” to trigger the wiper.

Was this article helpful?
Bu bilgiler sorununuzu çözmeye yardımcı oldu mu?
Still need help?
Uzman ekibimiz size yardımcı olmak için burada.