Using Just-in-Time Provisioning (JITP)
07 May 2026
8 views
Environment:
Contera CMR Web Service
Enable JITP
- Go to Management > Integrations and click Edit Button.png next to the integration.
- Click Identity Management.
- Scroll to the bottom and check the Enable JITP check box.
- Specify the desired group prefix and click SAVE.
NOTE: Any integration group with the specified prefix will be added to OWS automatically as soon as a user in that group logs in.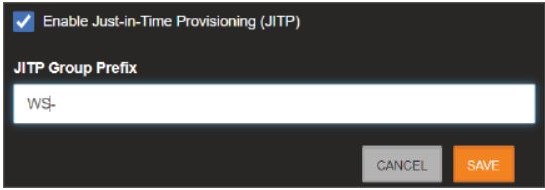
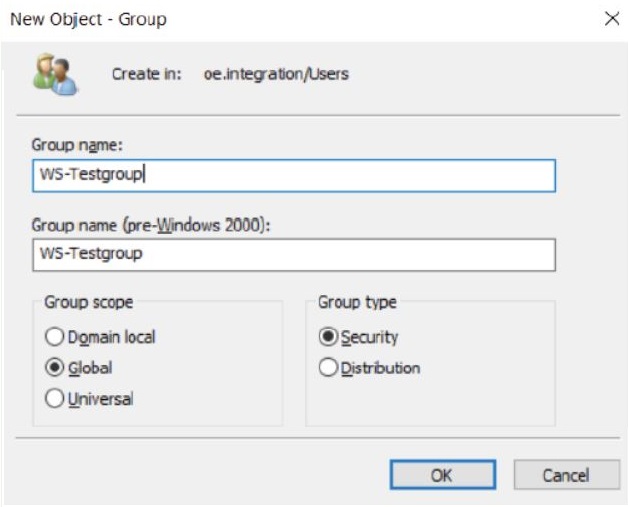
- In Active Directory Users and computers click on the Create a new group icon.
- Give the new group a name that starts with the prefix specified in step 4.
- Click OK
- Double-click on an existing user or create a new user.
- Click on the Member Of tab.
- Click Add and add the group that was created in Step 6.
- Click Apply.
- Click OK.

- Log in to WS if not already logged in.
- Go to Management > User Groups.
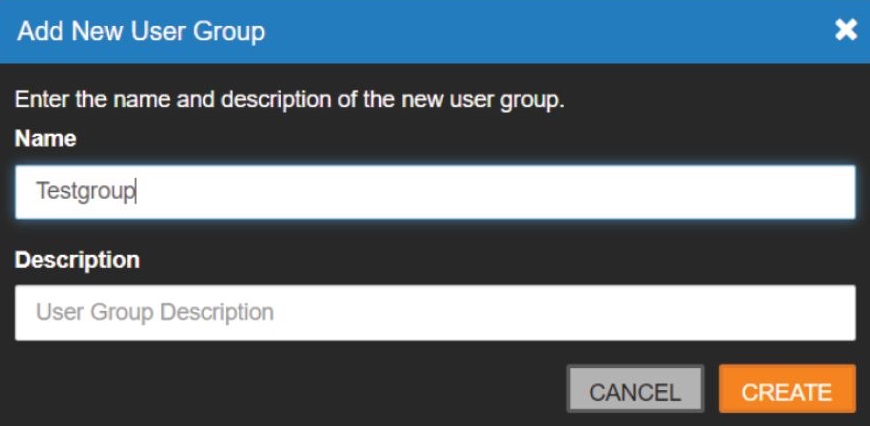
- Click ADD NEW USER GROUP.
- Add a group with the same name specified in step 6 without the prefix (WS- by default).
- Click CREATE.
- Select desired Web Services, Recorder and Client permissions for the group.
NOTE: Any integration group with the specified prefix will be added to OWS automatically as soon as a user in that group logs in.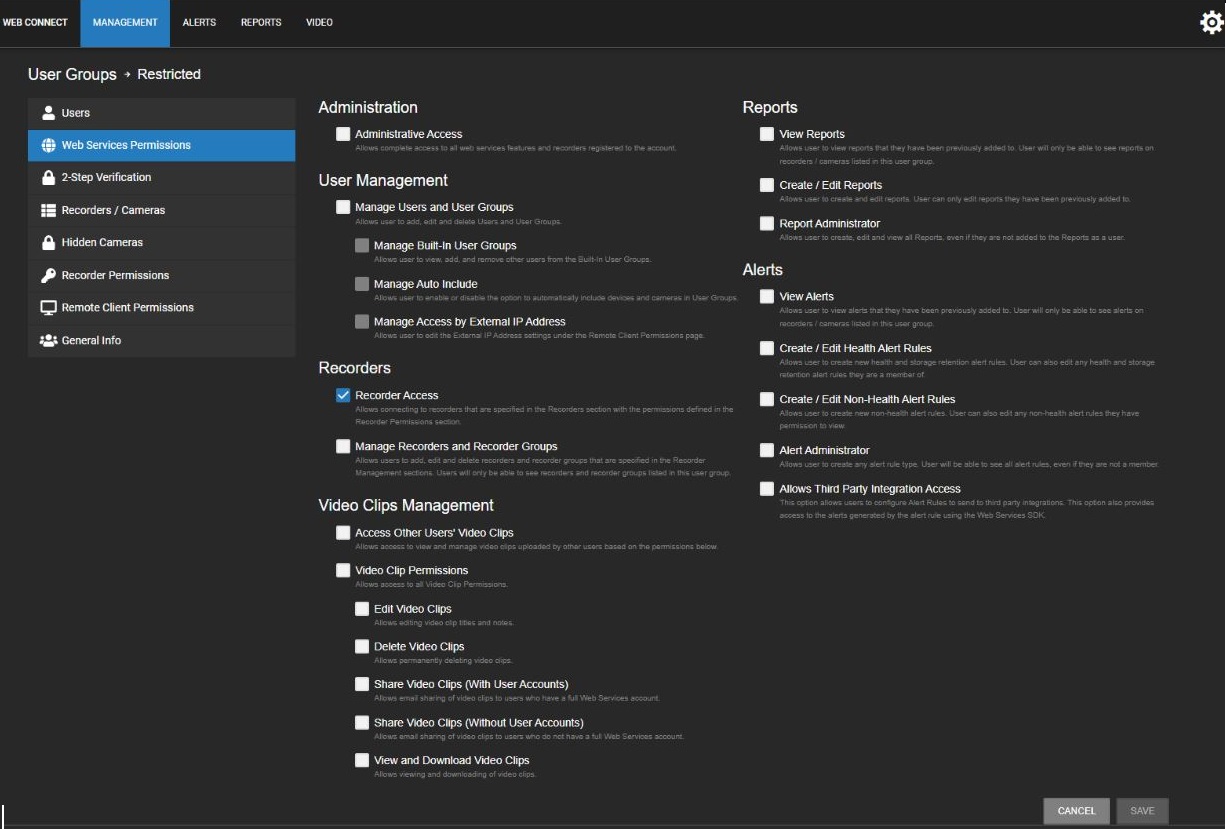
- Any user associated with the group will now be able to log in with the permissions set in step 18.
Was this article helpful?
Bu bilgiler sorununuzu çözmeye yardımcı oldu mu?
Thanks for your feedback!
Still need help?
Uzman ekibimiz size yardımcı olmak için burada.