Chapter I Introduction
The Milesight VMS Enterprise is featured with Client/Server architecture. The user accesses a system by logging into any server of the system on the client side.
l Server
Server refers to Milesight VMS Enterprise Server which are installed on the computer. The initial state of a server is an undefined server. Available on Windows.
A server is responsible for:
- Communicate with clients and other servers (Only master server)
- Camera management
- Get video stream from cameras and forward to client
- Record video from cameras to local or NAS storage
- Get event signals and trigger different actions
- Smart analysis – Store license plate recognition results and black/white list comparison
Recommend: The maximum number of cameras per server is 128.
l System
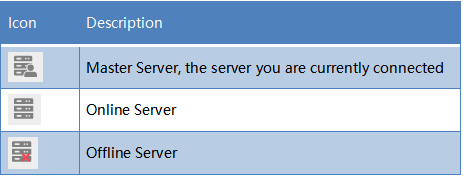
Icon
A system is made up of one or more servers. Any undefined server needs to be created as a new system or added to an existing system for use.
Multiple servers can form a system which can manage lots of network cameras in different locations. Every server in the same system shares all information about all cameras, users and settings except for recording files.
Recommend:
The maximum number of cameras per system is 2000. The maximum number of servers per system is 25.
l Client
Client refers to Milesight VMS Enterprise Client which are installed on the computer. Available on Windows.
A client is responsible for:
- Connect to any server, but only to one at a time
- Camera management, configuration and control
- View Live videos, up to 4 monitors and 64 channels per monitor
- Video playback, up to 64 channels synchronously or asynchronously
- Smart analysis – Black/white list management, ANPR settings and smart search
- View event notification
- System and server settings
- View event logs and audit trail
Note: D3D is required
l User
Every system has a list of user accounts that can have different rights. Only authorized user can access the system. Users are authorized by roles, and there are different types of roles.
Owner: There is only one ‘Owner’ user in the system. It is created when the system is created. It has the highest privileges
Administrator: It owns full access to function and operation permissions, resource access including Camera and Layout
Operator: It can see all cameras and own part access to function and operation permissions in the system
Viewer: It can see all cameras and have view permissions for only partial functions in the system
Custom role: Customize access permission to function, operation and resource including Camera and Layout
Recommend: The maximum number of users per system is 100.
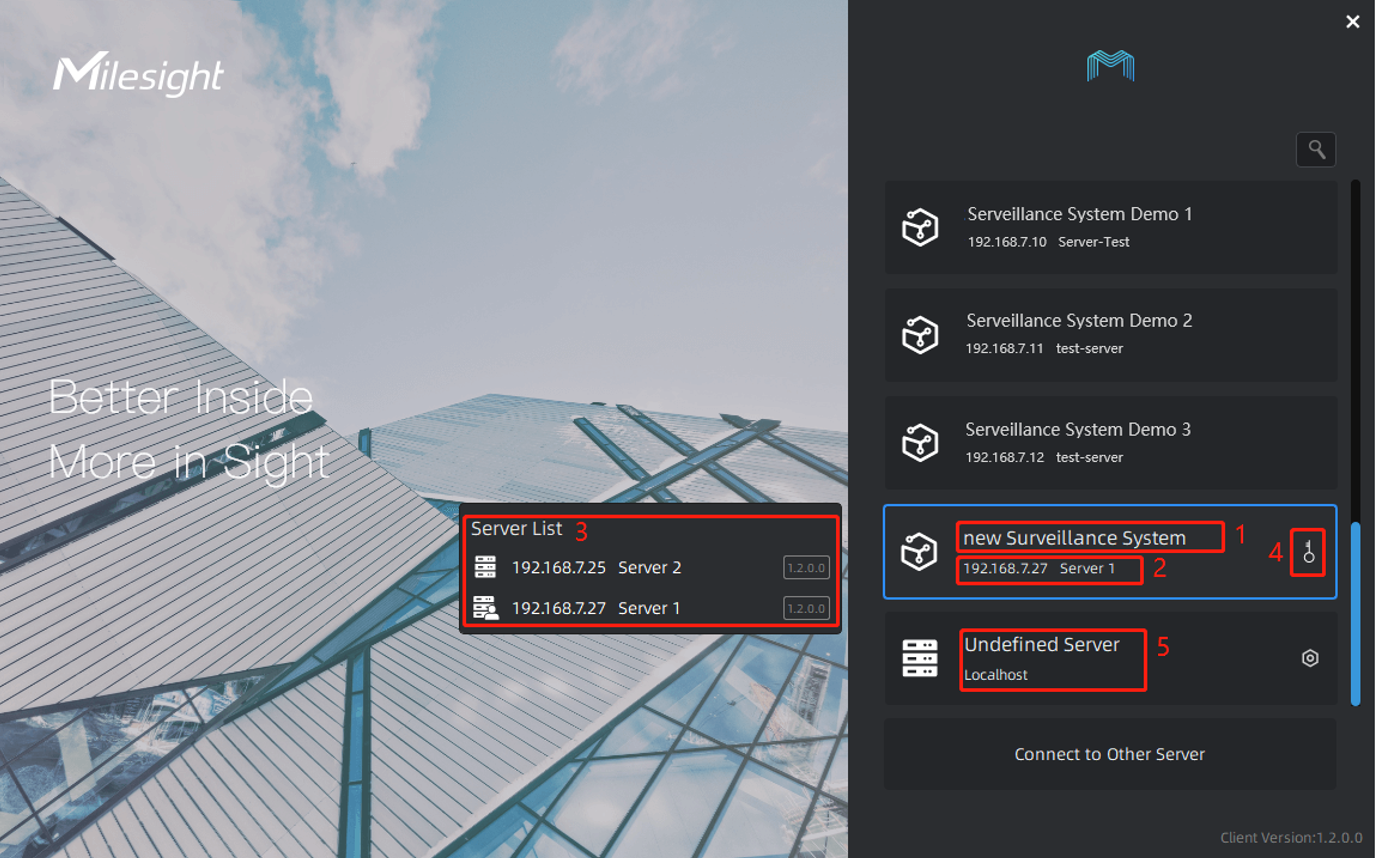
l Login Interface
Interface Description:
Chapter II Operations
2.1 How to add an undefined server into a system
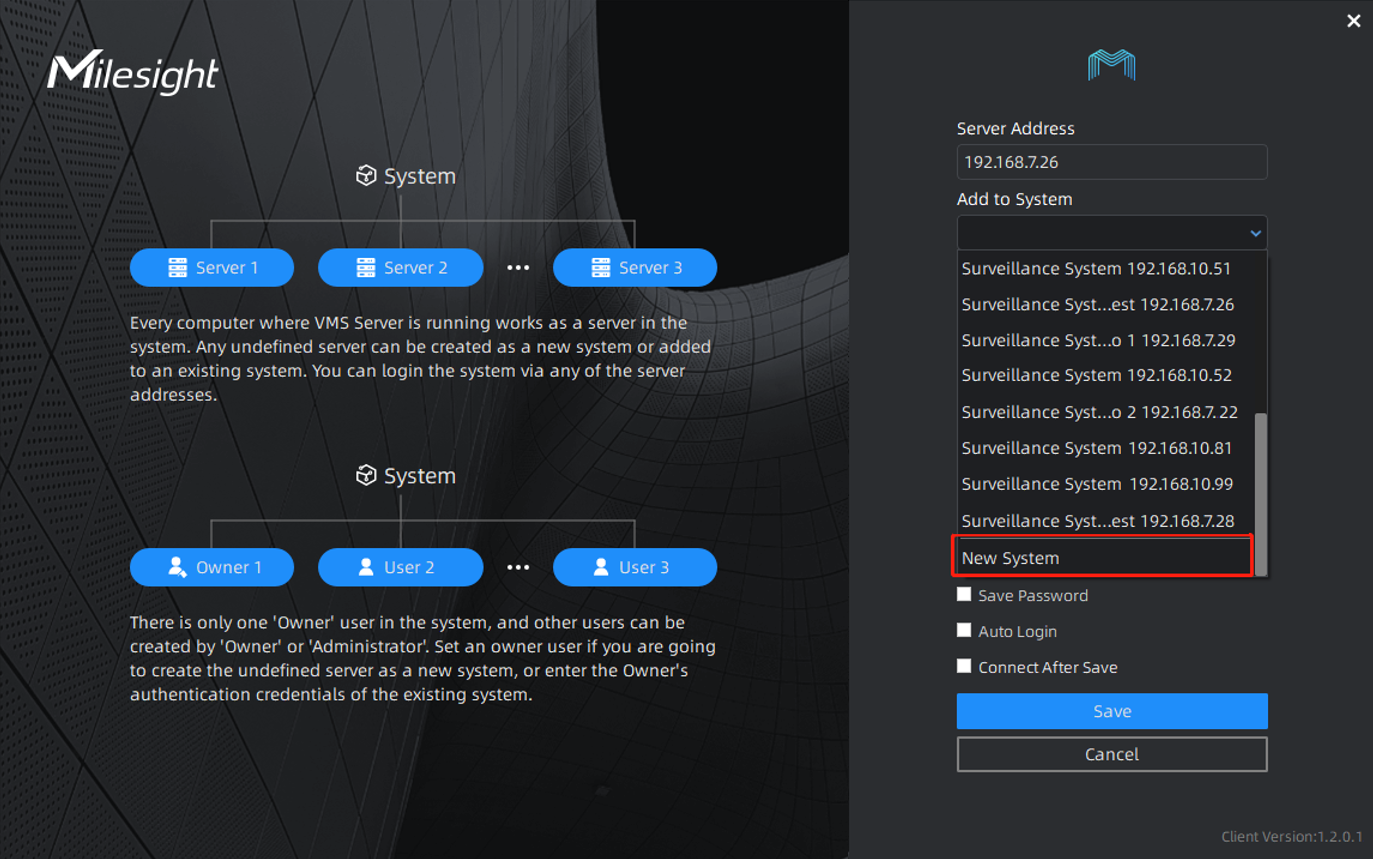
1. Add an undefined server into a new system
Step 1: Click an undefined server in the login interface. (Undefined servers are shown at the bottom of the list.)
Step 2:Select “New System”to create current server as a new system. (“New System” is shown at the bottom of the selections.)
Step 3:Set the system name, server name and an “Owner” user of the new system, then click “Save”.
You can check “Connect After Save”, then it will log in the system automatically after clicking “Save”.
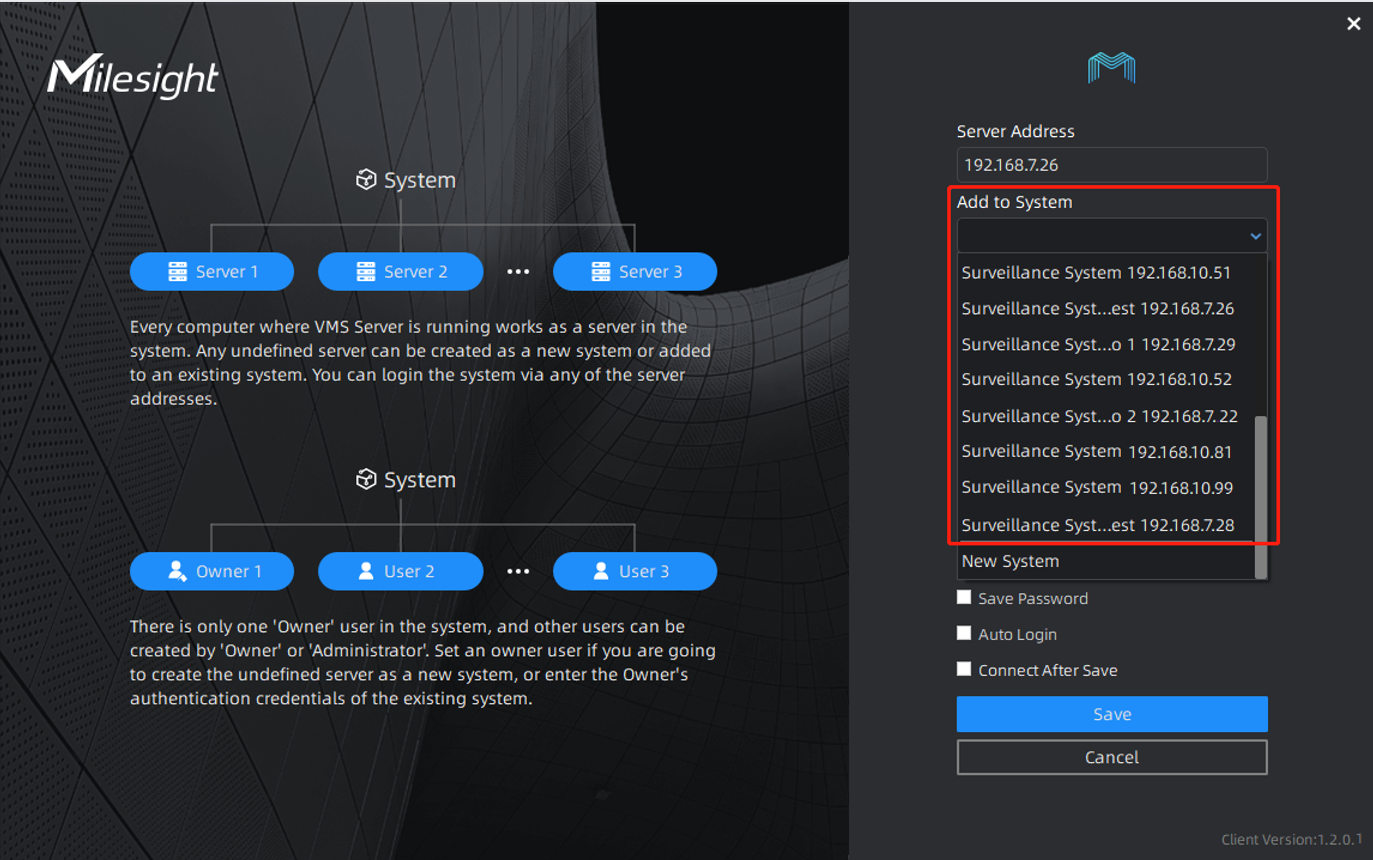
2. Add an undefined server into an existing system
Step 1:Click an undefined server in the login interface.
Step 2: Select an existing system.
Step 3: Configure server name and enter the owner’s authentication credentials of the system, then click “Save”.
You can check “Connect After Save”, then it will login the system automatically after clicking “Save”.
Note: If the password is entered incorrectly more than 6, the system will be locked for 30 minutes.
2.2 How to detach a server from a system
Step 1:Click “Settings” in the top menu bar. And Click “System & Servers” -> “Server Settings” in the left menu bar. Select the sever in the server list, click “Detach Server”.
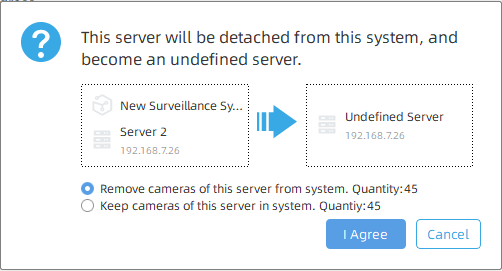
Step 2: Click “I Agree”.
If there are multiple servers in the system, you can choose to remove or keep the cameras added to this server.
l Remove cameras of this server from system: after detaching the server from the system, the cameras added to this server will be deleted at the same time.
l Keep cameras of this server in system: after detaching the server from the system, the cameras added to this server will be allocated to other servers of the same system automatically for load balancing.
After detaching the server from the system, then it becomes an undefined server.
Note:
1.Only the Owner user has permission to perform the “Detach Server” operation.
2.When a server is offline, if you click “Delete Server”, the server isn’t really detached from the system. It just doesn’t be shown in the server list. Once the server restores online, it still can be displayed in the server list and start working.
If a server has been added into a system, it needs to be detached from the system as an undefined server, then add the undefined server into other system.

