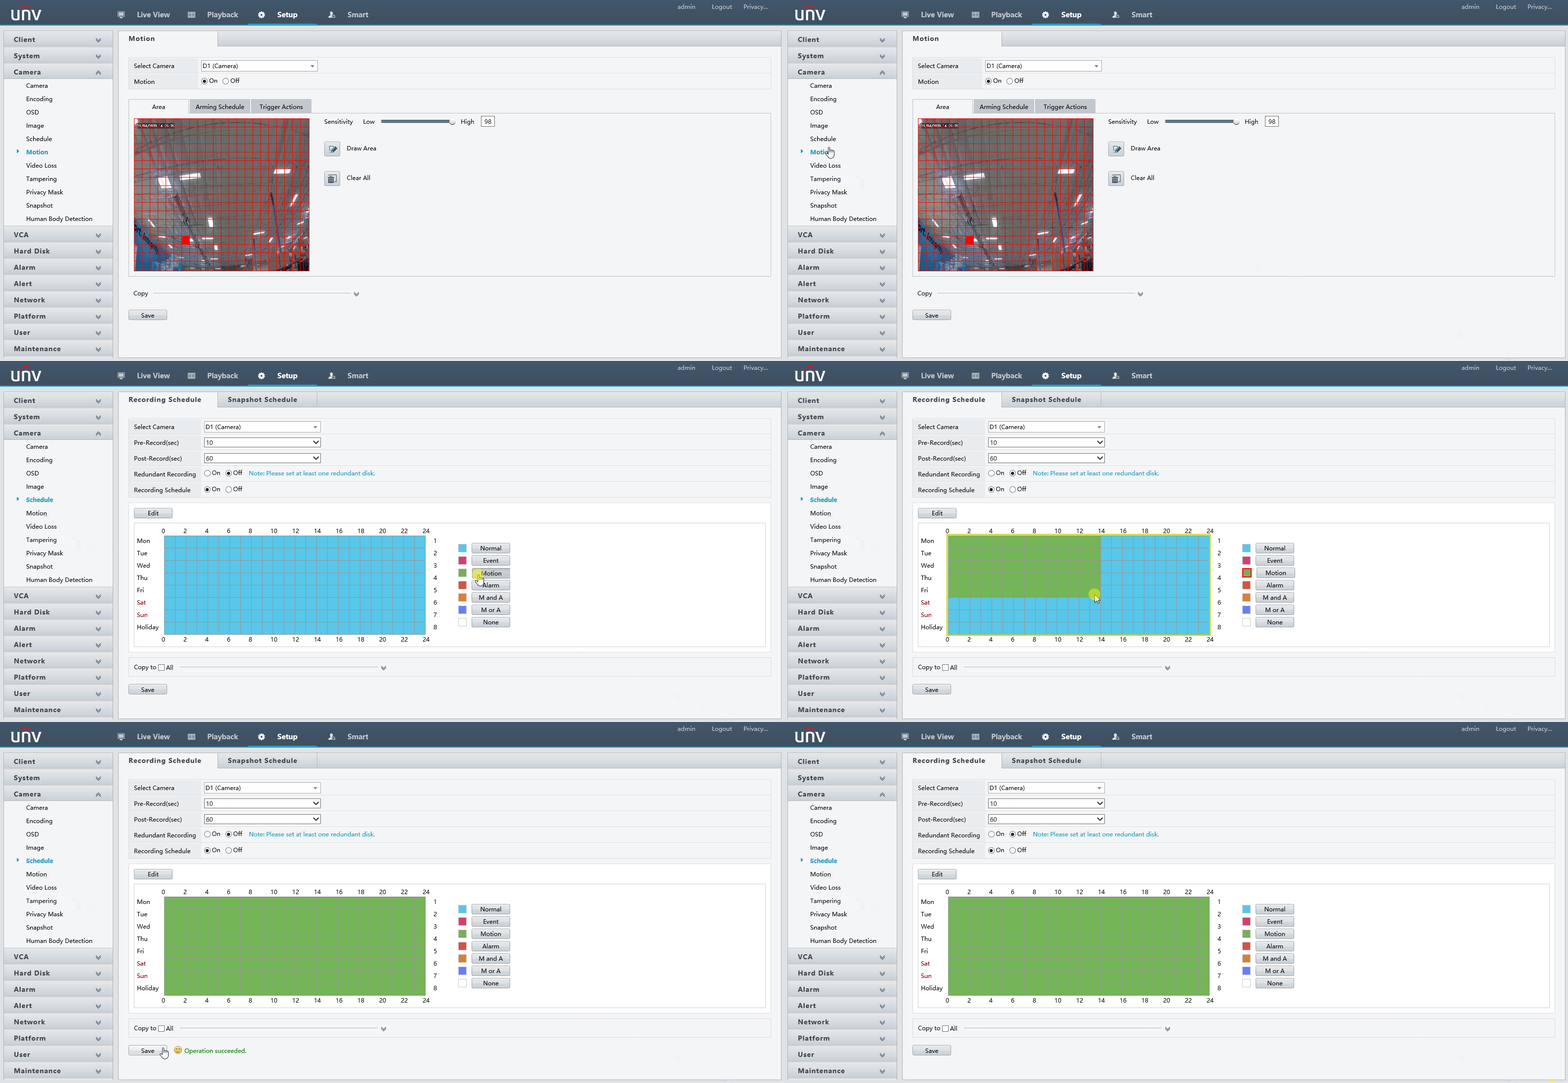
Motion detection recording allows you to only record footage when there is activity in any of the areas that you are monitoring, making it easier to search for events recorded and also allowing your system to conserve disk space on your NVR’s hard drive.
Step 1. Navigating To The Motion Settings #
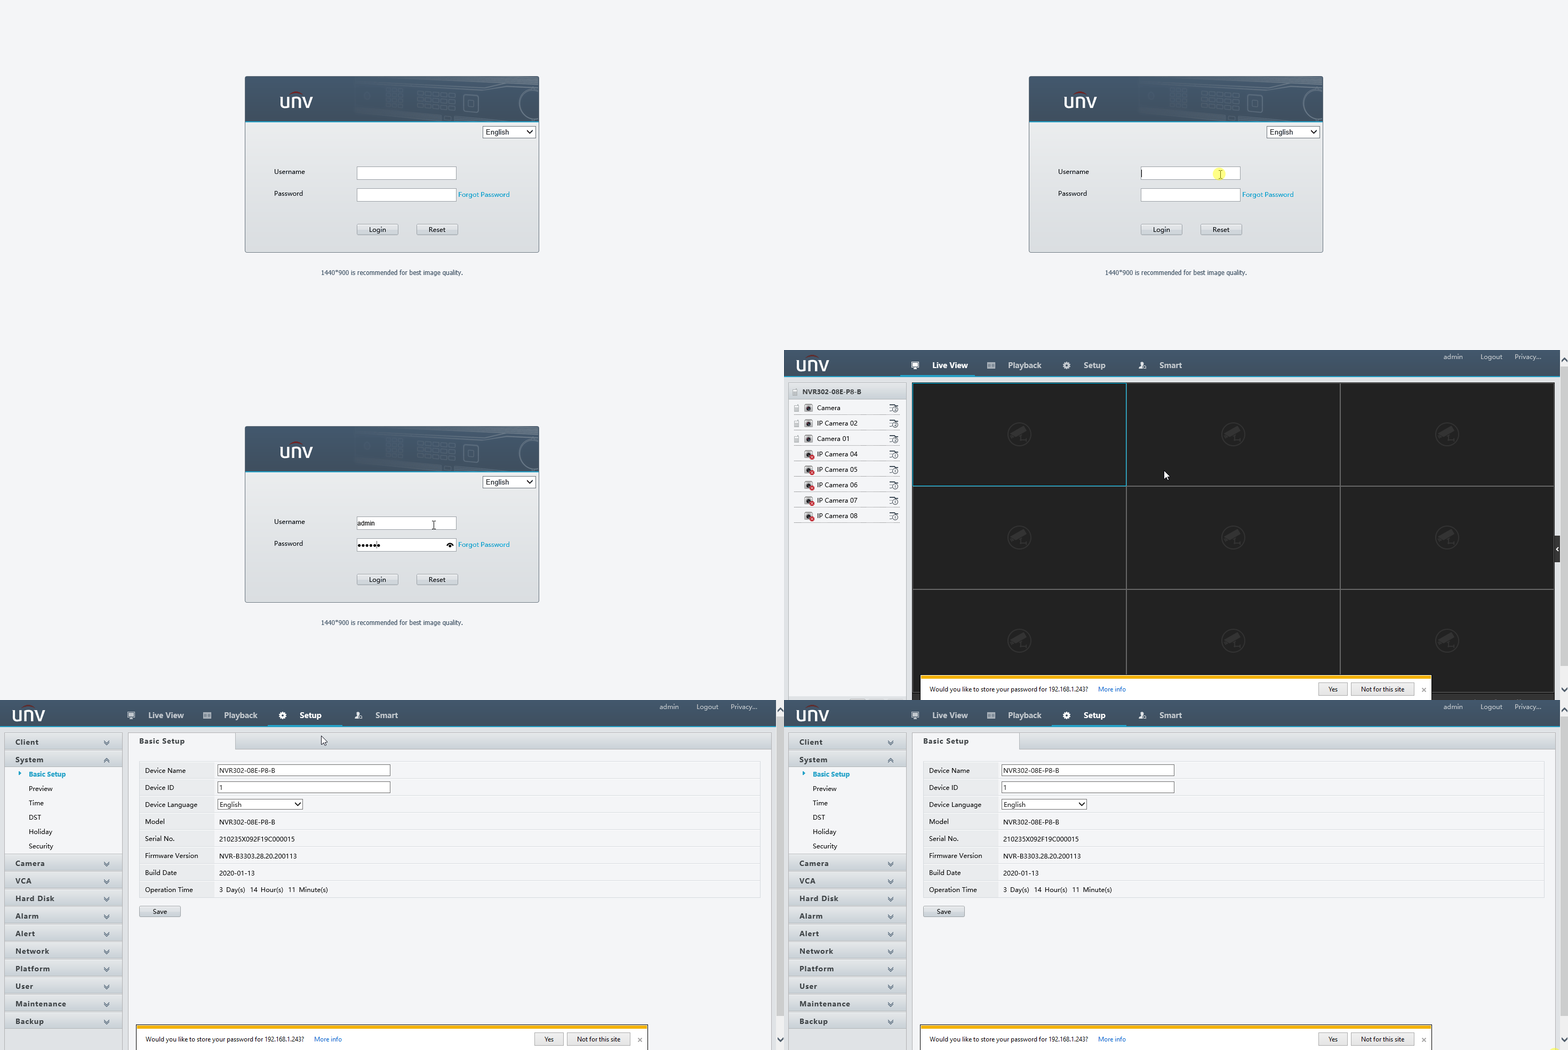
- Open the recorder web login by typing the recorders local IP address / external IP / DDNS into the Internet Explorer web browser.
- Click “Download” at the top of the page to install the web plugin. Make sure you close your browser during the installation.
- Reopen the recorders login page and login using your user name and password (Default is Username: admin Password: 123456)
- Once you are logged in navigate to the “Settings” button at the top of the screen
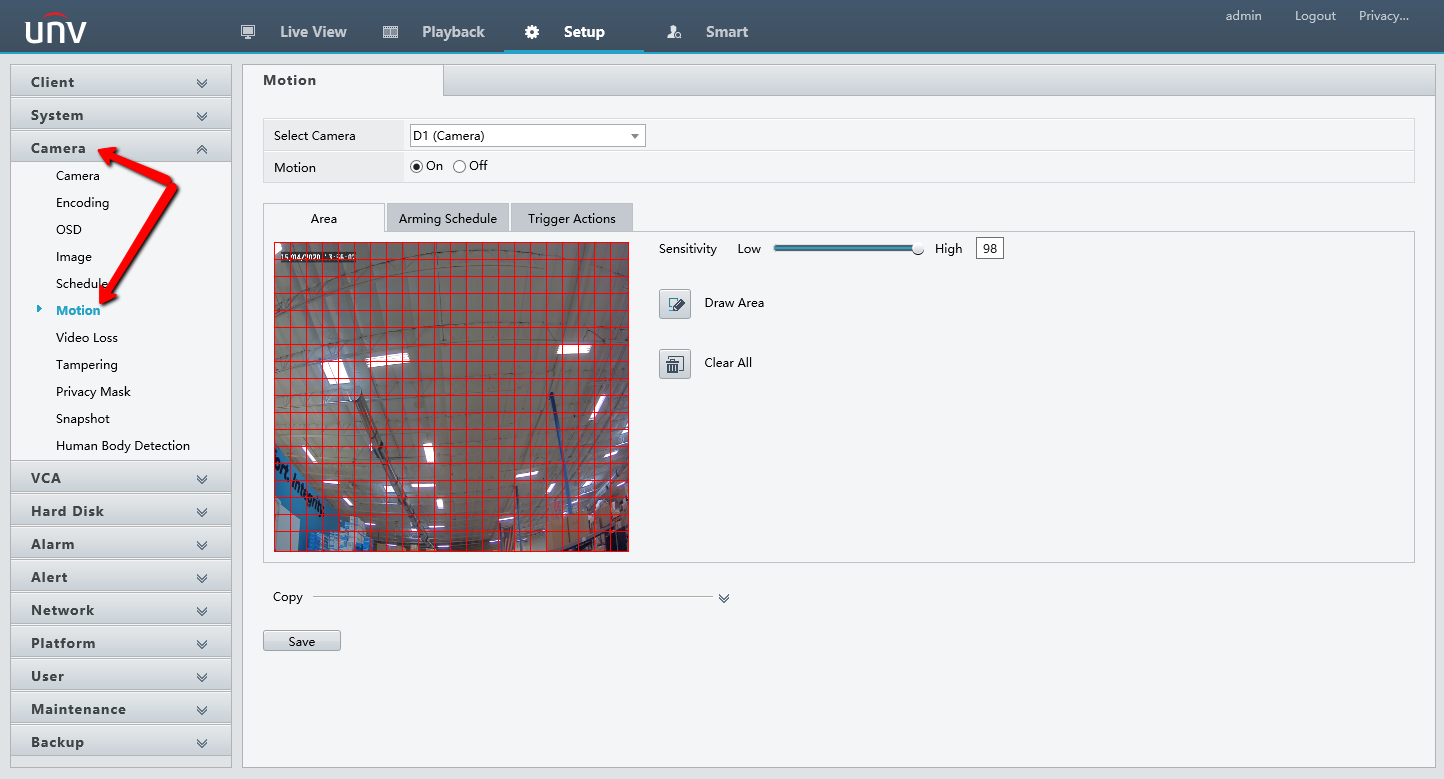
- . Once in the “Settings” menu on the left hand side navigate to “Camera > Motion”
- All of your motions settings will be found in this menu. The first setting that will need to be configured is the “Area”. To set up the area for detection first click on “Start Drawing”, next on the image provided to the left start in the corner and drag and drop a red grid over the whole image.
- Next make sure that the “Motion” setting is check to the “On” Position.
- Every situation is different where the camera will be installed. Typically setting the sensitivity to 50 is recommended, then adjusting from there if needed. Either lowering if too many false triggers occur, or raising it if little to no triggers occur
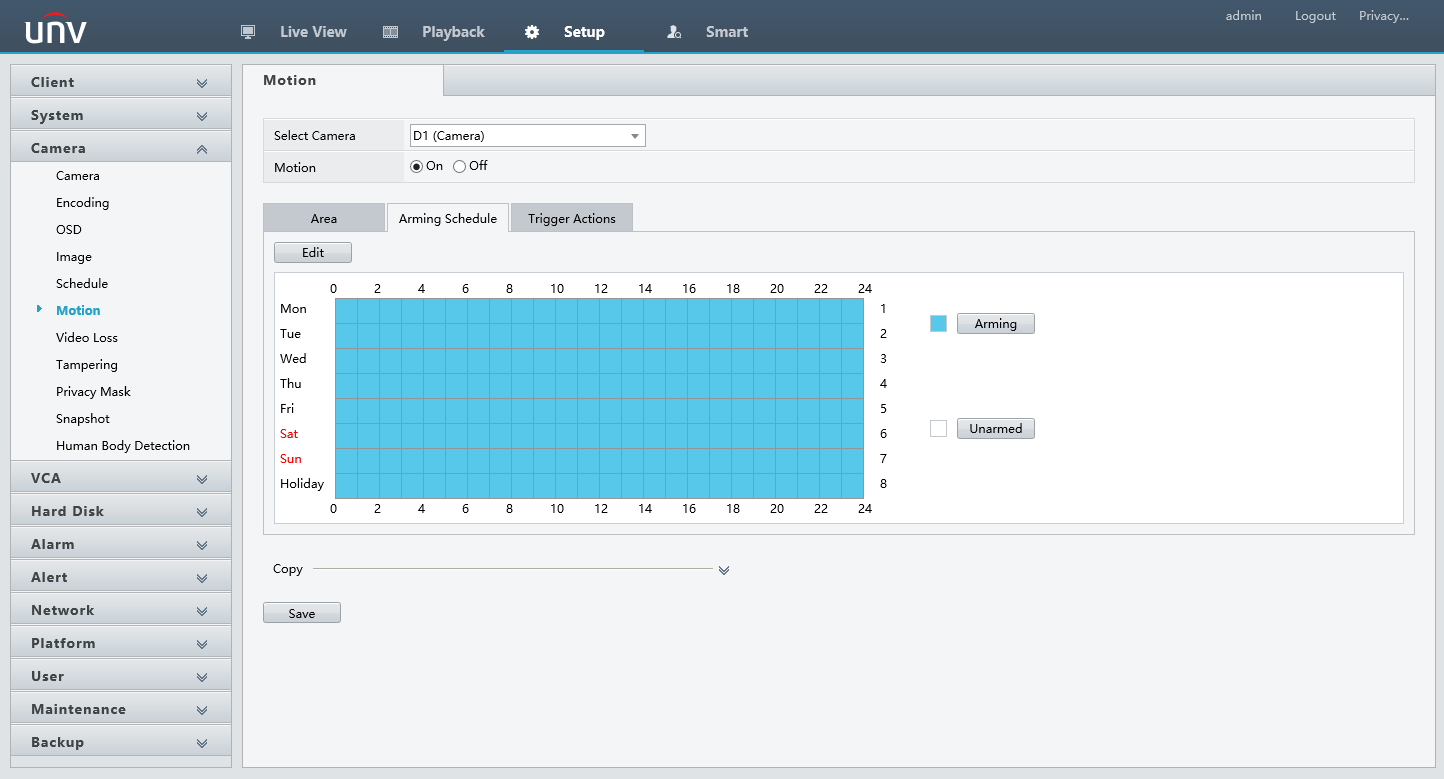
- Setting the Arming Schedule will be the next tab over.(time when actions will be
triggered). We usually recommend keeping this at 24/7, but every situation is different!
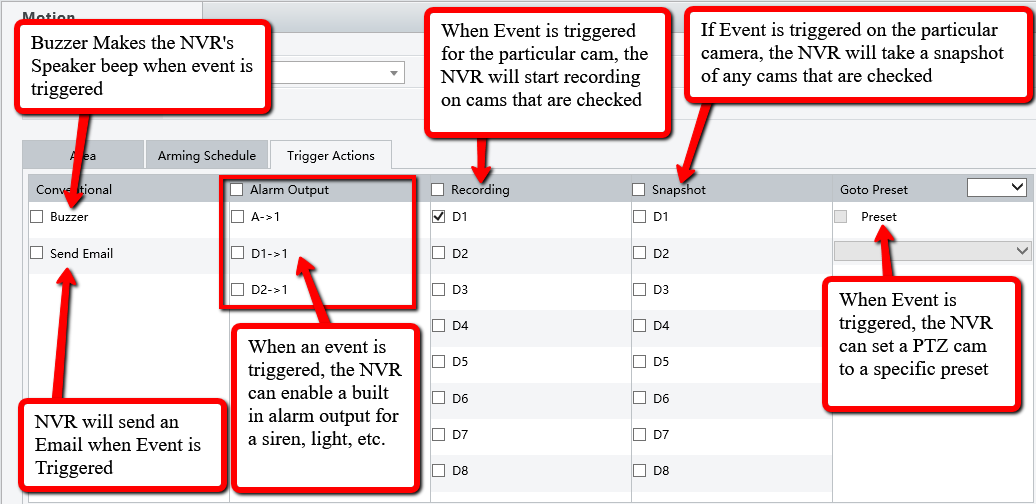
- Next setting to set up is going to be the “Trigger Actions”. The trigger actions are set up to the camera what to do when motion is detected. The main setting that you want to make sure you have set is the “Trigger Recording”. When setting the trigger reordering setting you want to check on the channel that you are currently configuring, for example if you are configuring motion for camera one in the trigger recorder menu “D1” would be checked on while all the other are unchecked and if you were configuring channel 5 under trigger recorder “D5” would be checked on while all the other were unchecked.
Key #
- Conventional
- Buzzer – The NVR’s Speaker will beep when event is triggered.
- Send Email – NVR will send an Email when Event is Triggered
- Alarm Output – When an event is triggered, the NVR can enable a built in alarm output for a siren, light, etc.
- Recording – When Event is triggered for the particular cam, the NVR will start recording on cams that are checked
- Snapshot – When Event is triggered on the particular camera, the NVR will take a snapshot of any cams that are checked
- Goto Preset – When Event is triggered, the NVR can set a PTZ cam to a specific preset
Step 2. Setting Up The Schedule #
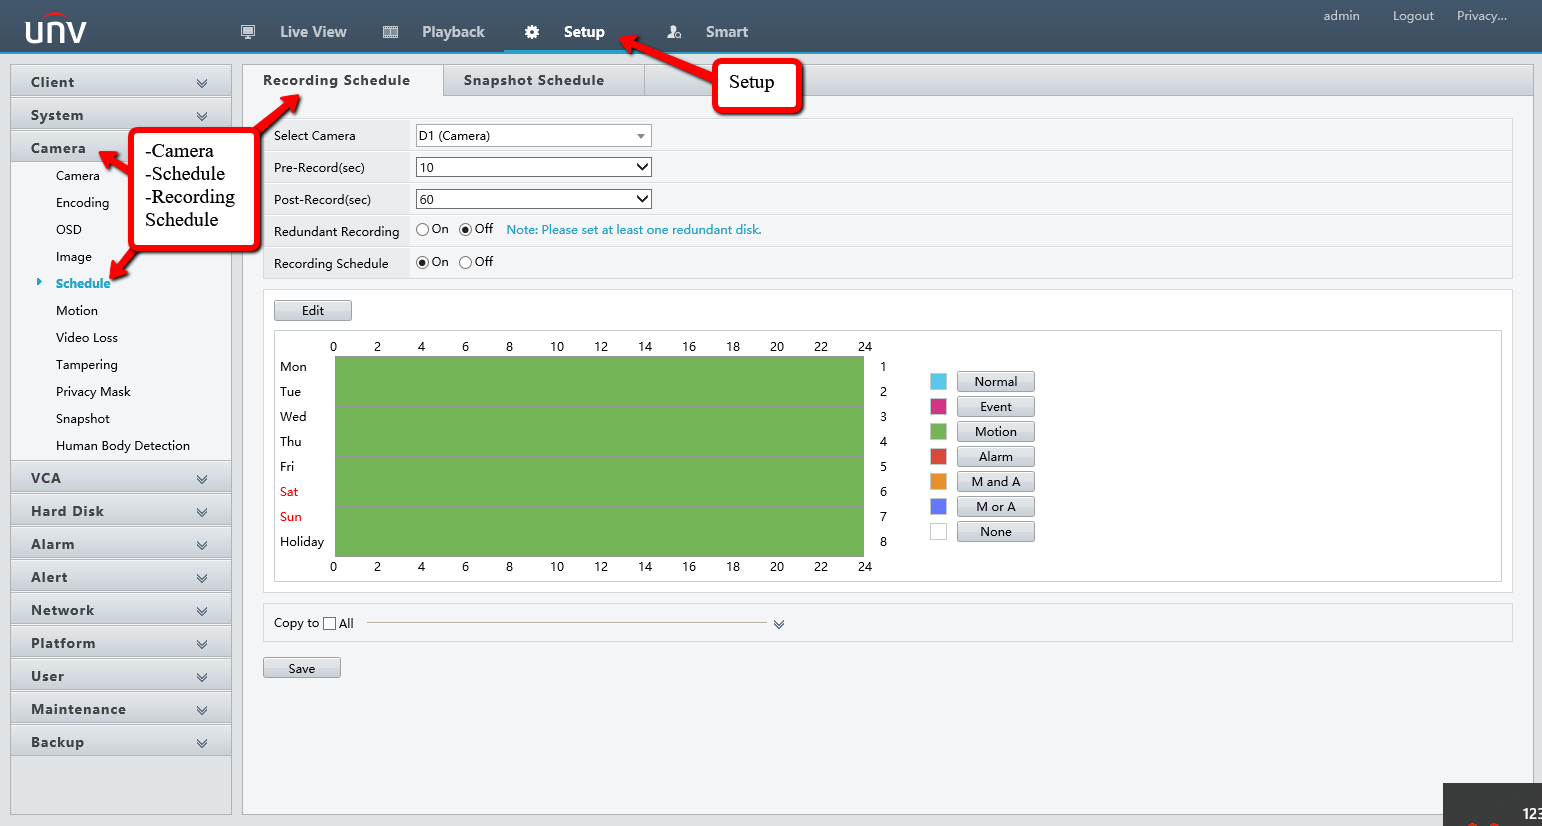
- Next thing to set up will be the Schedule on the recorder. To access these setting navigate to “Settings > Camera > Schedule”
- Pre-Record is for how much data will be saved from before the motion started. Post-Recorder is how long the camera will keep recording even after it has stopped detecting motion.
- Make sure that “Recording Schedule” is check to the “On” position.
- First thing you want to think about is if you want the cameras to record all of the time or on motion in this tutorial we are setting up all camera on motion. If you want the camera to record all of the time by default you can leave the schedule at the all blue color.
- To change the Schedule to motion you can click the “Motion” button on the right and then drag and drop the green color over each day and hour starting in the corner.
- Other option for setting up the Schedule is you can click on the “Edit” button just above the upper left corner. This will allow you to manual type in each periods start and end times how you want the recorder to record during that time.
- You can then use the “Copy to” drop down to copy the schedule to all cameras or you can manual set up each camera by changing the Camera ID at the top.
