This guide will walk you through setting up your R-Series camera on an H-Series or a Hikvision NVR. If you haven’t already, read this guide to ensure your camera is properly setup for third party NVR integration.
There are two different methods you can use to connect your R-Series camera to a Hikvision NVR. It all depends on how you have it wired.
Do you have your R-Series camera connected to a router or a PoE switch separate from your NVR? Or do you have your R-Series camera connected to the built-in PoE switch on the NVR itself?
Your Camera is Connected to a Router or PoE Switch Separate from the NVR: #
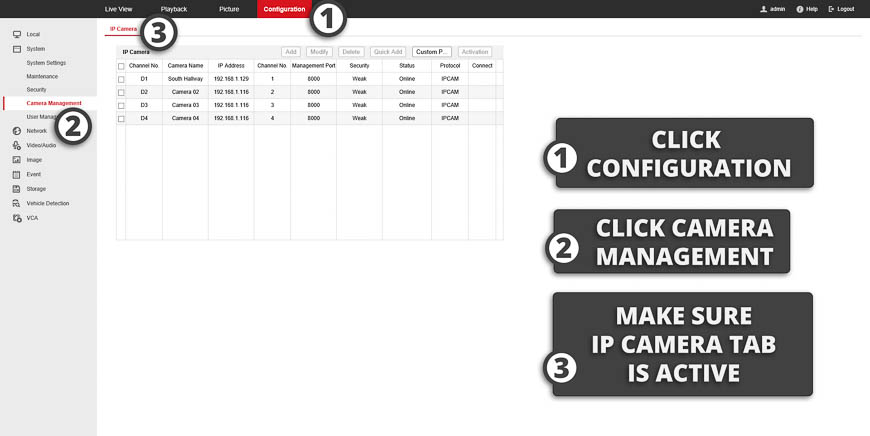
Log into your Hikvision NVR’s web interface and navigate to the Camera Management section: #
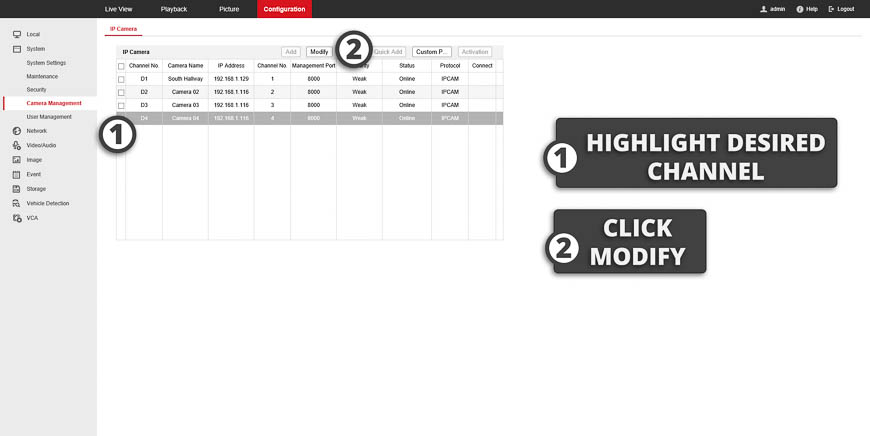
Highlight the channel onto which you want to add the R-Series camera and click “Modify.” #
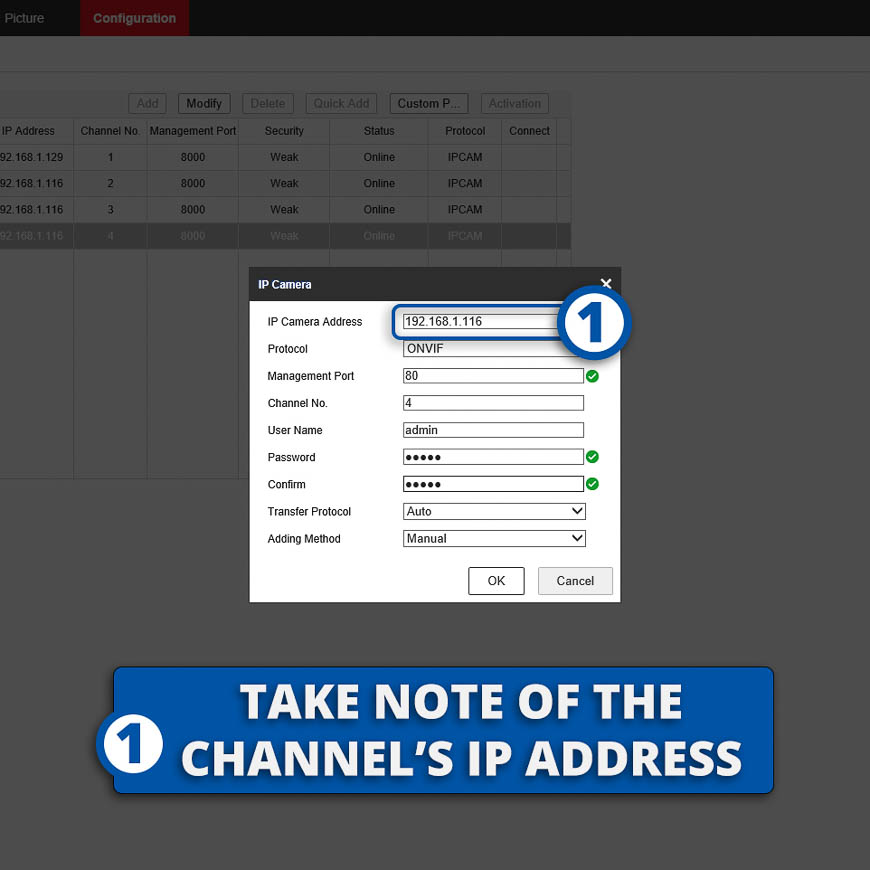
Change the credentials to match your camera’s credentials #
| 1 | IP Address: | Enter your camera’s IP Address |
|---|---|---|
| 2 | Protocol: | ONVIF |
| 3 | Port: | 80 |
| 4 | User Name: | admin |
| 5 | Password: | admin |
| 6 | Transfer Protocol: | auto |
| 7 | Adding Method: | Manual |
Congrats! You should now see your R-Series camera on the NVR.
Your Camera is Connected Directly to the PoE Switch Built Into the Back of the NVR: #
Log into your Hikvision NVR’s web interface and navigate to the Camera Management section: #
Highlight the channel onto which you want to add your R-Series camera and click “Modify.” #
Enter the Following Credentials #
| 1 | IP Address: | Don’t change; take note of this. |
|---|---|---|
| 2 | Protocol: | ONVIF |
| 3 | Port: | 80 |
| 4 | Channel: | Desired Channel |
| 5 | User Name: | admin |
| 6 | Password: | admin |
| 7 | Transfer Protocol: | auto |
| 8 | Adding Method: | Manual |
Log Into Your Camera via Camviewer and Change the Following Credentials. #
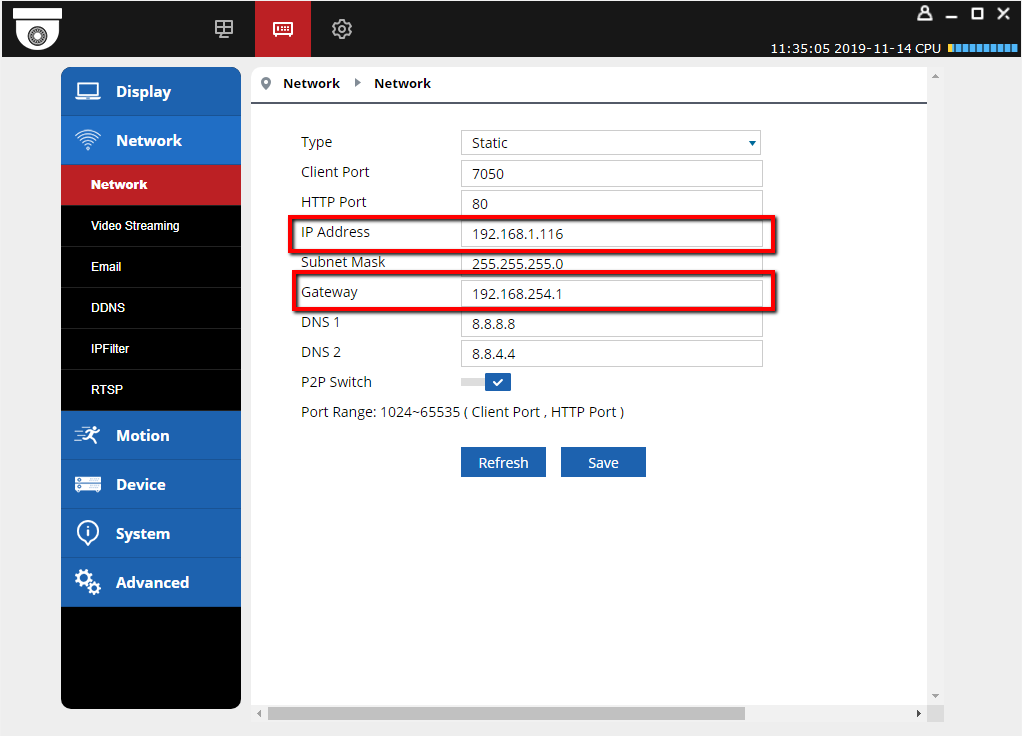
While your camera is still plugged into your main network (not the NVR), log into the camera using the CamViewer software and visit the network settings. Change the following credentials:
| 1 | IP Address | Change this to the IP address from step three. |
|---|---|---|
| 2 | Gateway: | 192.168.254.1 |
Be sure to click Save when done.
Plug your camera back into the NVR #
Be sure to plug it into the port that coincides with the channel you configured back in step 2. Wait a couple of minutes for the camera to boot up and you should see your camera on the NVR.


